Models (Example, next step)
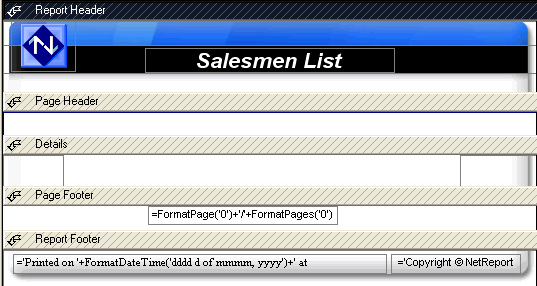
A Model contains everything which was in the source Report
Note: a model resembles the source report, however the blocks in models are shaded with grey diagonal hatching to enable users to easily distinguish between a report and a model. Note that if the source report contained break levels then they will not be included in the model, since models cannot manage them.
Note: models are not based on queries and the fields they contain will not be fed by columns but by keywords which were previously defined.
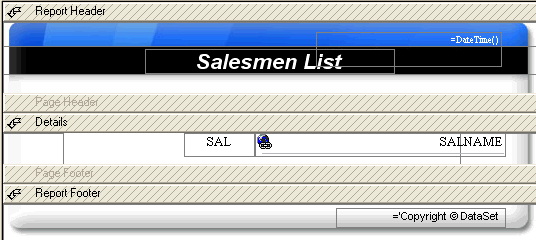
The previous report example gives the following model
Display Hidden Items if necessary: the Page Header and Page Footer blocks are hidden in this report, the user can select to Unhide them if they need to be used.
Move and Modify certain Items to keep: for example, move the Report Header blocks DateTime field to the Report Footer block and modify the date to display. For example, modify the Copyright at the base of the report.
Add New Items if necessary: add a logo to the Report Header block and page numbers to the Report Footer.
Delete Useless Items: delete the Details block fields which will be replaced by fields which are specific to the model. Delete the Detail block row if the user does not need it in the model.
Define Specific Elements for this model to be used when creating a report:
Titles Position
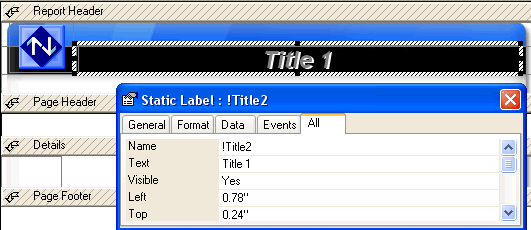
Select the old Report title, right-click and select Title 1 from the list of items displayed.
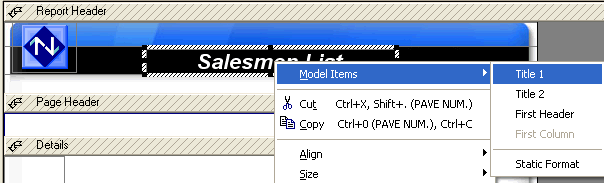
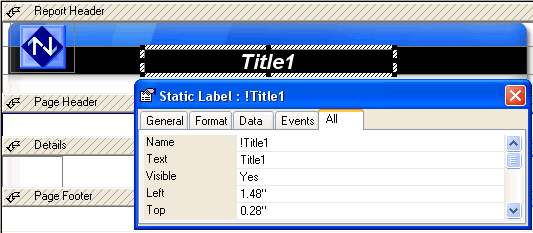
Position the title as appropriate and modify its size and attributes: (note that the internal name has become !Title1, this is a fixed name, it cannot be modified and the visible title has become Title 1. This title will be replaced by the query name later on when creating a report via this model).
If necessary, repeat the procedure with a second label field in order to define a !Title2 field which will have the same title, but which will be juxtaposed to give a shadow or relief effect to the title:
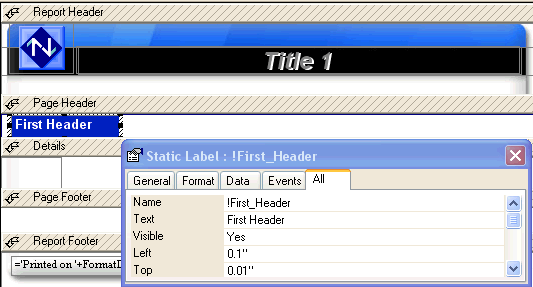
Positioning the First Header
Select a Label type field from the tool box and place it in the Page Header block exactly where the First Column Header should be, then right-click and select First Header from the list of items displayed. Define the attributes as appropriate (size, font, colour etc ). Adapt the block height as appropriate:
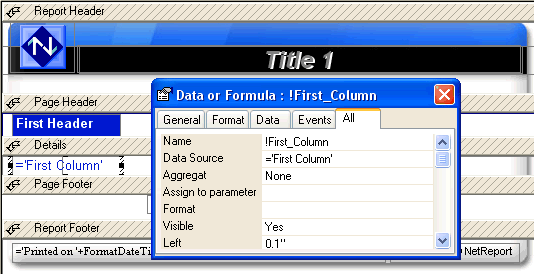
Positioning the First Column
Select a Data/Formula type field from the tool box (or an old data field if they have not been deleted) and place it in the Details block exactly where the First Data Column (the first field in the query) should be, then right-click and select First Column from the list of items displayed. Define the objects height, font, font colour as well as the height of the Details block as appropriate:
Note: at this stage the essentials have been defined, the formats for each column will respect the rules previously mentioned in the online Help. (Query column formats, or windows default values, or additional field formats specifically designed for this purpose, see the next step).
It is now possible to save the new Model, then to close it and close the Report Model window by clicking the Close button.
Open a query, create a new report and select the model that was just created in order to test it.
To modify the model, select Tools> Models and edit the model concerned.